


IP cameras can transmit video signals both within the local network they are connected to and over the Internet. We offer you the following guide for setting up the camera for remote access.
Configuration – local access
Before setting up the camera for remote access over the Internet, configure it for local access. The booklet that comes with the device usually describes all the steps of the respective procedure. Once this stage is successfully completed, you are ready to continue.
Configuration – remote access
Ask your network administrator if you have the necessary rights to set up the camera for remote access. If everything is OK, continue.
To make the camera work over the Internet, you will need to configure Port Forwarding. The port numbers that need to be set are described in the IP camera's user manual. For detailed instructions on how to do this, see www.portforward.com, where procedures for different router models are described.
Step 1 – Detect the IP address
To access the router's configuration panel, you need to know its IP address. You can get it from your network administrator or display it with a few simple commands. Select Start, Run, type cmd, and then ipconfig /all in the terminal window. Confirm with Enter .

Fig. 1 – Entering the console terminal
The router address is in the Default Gateway line. In this case, it is 192.168.0.1 (Fig. 2).

Fig. 2 – The result of executing the "IPCONFIG" command
Step 2 – Router Setup
Simply enter the router's IP address into the browser's address bar. In the example image below, we enter the address 192.168.0.1 into Internet Explorer.
IP cameras can transmit video signals both within the local network they are connected to and over the Internet. We offer you the following guide for setting up the camera for remote access.

Fig. 3 – Entering the router configuration menu
Step 3 – Configure Port Forwarding
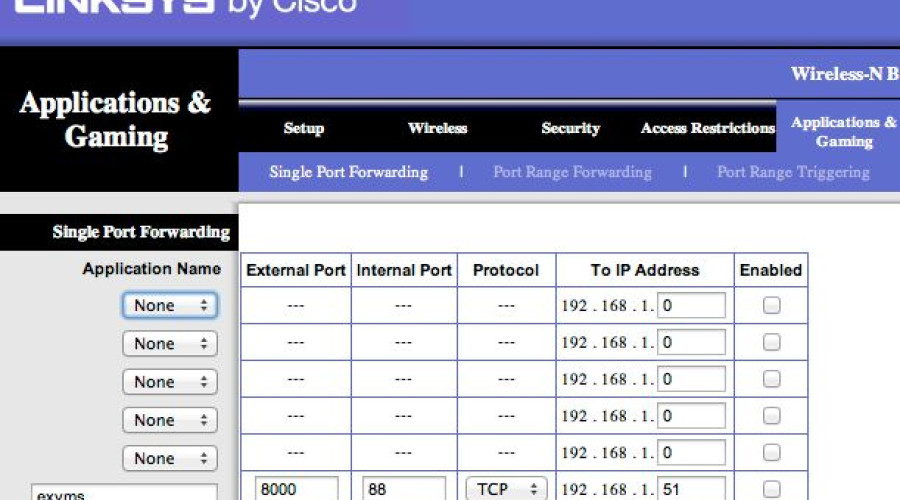
Now find the section in the router configurator through which PF is performed. Fig. 4 shows an example screen. The local IP address of the camera is entered, as well as a unique name that is associated with it. In this case, we select port 80. There are cameras that require you to allocate several ports to them in order to use their full set of functions. You must also specify the connection protocol that you will use. The most common cases are UDP, TCP or both options. Select “both”. We complete the setup by pressing the Apply button.

Fig. 4 - Port Forwarding
IP cameras can transmit video signals both within the local network they are connected to and over the Internet. We offer you the following guide for setting up the camera for remote access.
After saving the settings, review the table, which lists specific tasks and devices, along with their corresponding ports. An example of such a table is given in Fig. 5. The last row contains the data for the wireless camera "IP Network Camera".

Fig. 5 – List of applications requiring port access
Step 4 – Access the camera via the Internet
Once you have set up the router, it is time to check if everything is working properly. We recommend that you try accessing it directly from an address external to the local network. There you should enter the public IP address, which you should get from your Internet provider. You cannot see anything if you enter the local IP (in the example 192.168.0.100) because it is only visible within the local network to which the camera is connected.
In Fig. 6 below, the public IP address is entered in the browser address field – 84.201.198.70, port 1081. The specific camera model does not use the standard port 80, unlike mass-produced models. In most cases, specifying port 80 is not necessary, because it is checked by default.